Working With Yeast Again: French Bread Recipe

I don’t know about you, but I LOVE bread. Any & all types of bread. If I had to eat the same food everyday for the rest of my life, it would be fresh bread & butter.

I always wanted to make my own bread, without a bread machine. I wanted to make true, ‘from scratch,’ bread. The only thing is that yeast used to freak me out. I tried cooking with it once, and things did NOT turn out well, so from that point on I just kind of gave up on it. This is rare for me, anything involving cooking I will try over and over again until I get it right. For some reason though, using yeast again was not an option…until a couple of weeks ago.

Aviary Photo_130177866537283356

I really wanted French bread to go with our dinner, but I didn’t feel like going to the store to get it. So I thought I would give baking with yeast one more try. Boy am I glad I did!

This bread turned out PERFECT! SO make tastier than store bought bread, and it was actually pretty easy to make. Although time consuming, worth every second.

Aviary Photo_130177867771862033

French Bread

(adapted from this recipe)

Yield: 2 large loaves

Ingredients:

  • 1/2 cup warm water (100-110 degrees F)

  • 2 teaspoons sugar

  • 2 (.25 ounce) packages active dry yeast

  • 5 cups all-purpose flour, plus additional flour for kneading

  • 1 tablespoon salt

  • 1 and 1/2 cups warm water (110 degrees F)

  • 1 tablespoon cornmeal

  • 1 egg white

  • 1 tablespoon water

Directions:

  1. Proof Yeast: In a medium bowl combine 1/2 cup warm water, sugar, and the two packages of yeast, let stand 10 minutes. If mixture doubles in volume, the yeast is active. (if not, your yeast may be expired)
  2. In a large bowl, combine 2 cups flour, yeast mixture and salt. Stir in 1 and 1/2 cups warm water, and beat until well blended using a stand mixer with a dough hook attachment. Using a wooden spoon, stir in as much of the remaining flour as you can.
  3. On a lightly floured surface, knead in enough flour to make a stiff dough that is smooth and elastic. Knead for about 8 to 10 minutes total. (**Do NOT try to rush your kneading time- be sure to knead the ENTIRE time- even set a timer, if need be.) Shape into a ball. Place dough in a greased bowl, and turn once. Cover, and let rise in a warm place until doubled. (I left it for about 2 hours to rise, but that long is not necessary- at least an hour, I would say.)
  4. Punch dough down, and divide in half. Turn out onto a lightly floured surface. Cover, and let rest for 10 minutes. Roll each half into large rectangle. Roll up, starting from a long side. Moisten edge with water and seal. Taper ends.
  5. Grease a large baking sheet. Sprinkle with cornmeal. Place loaves, seam side down, on the prepared baking sheet. Lightly beat the egg white with 1 tablespoon of water, and brush on. Cover with a damp cloth. Let rise until nearly doubled, 35 to 40 minutes.
  6. With a very sharp knife, make 3 or 4 diagonal cuts about 1/4 inch deep across top of each loaf. Bake in a preheated 375 degrees F (190 degrees C) oven for 20 minutes. Brush again with egg white mixture. Bake for an additional 15 to 20 minutes, or until bread tests done. If necessary, cover loosely with foil to prevent over browning. Remove from baking sheet, and cool on a wire rack.

Aviary Photo_130178027668235172

Mmmmm just looking at it again makes me want to bake some more TODAY! I was amazed at HOW good it turned out. It was soft, and fluffy.

Aviary Photo_130178027880028281

This bread was the perfect complement to our pasta dinner- of course served with a bit of butter. Can’t have fresh bread without butter! Smile

The only thing that I did learn, sadly, is that because this bread is home made, there are no preservatives. You either have to eat it within a day or two, or freeze it. We couldn’t eat the whole loaf the first night (thankfully I froze the second loaf right away), and I went to go and eat it a few days later only to have stale bread. Bummer! Now I know.

I actually want to try baking with more yeast. I really enjoyed making this bread, kneading gets out a lot of frustration. Winking smile I think I may try homemade pizza dough this week, and maybe I’ll branch out even further as time goes on. I don’t know why it took me so long to try using it again, it’s really not that intimidating at all!

Favorite type of bread??
Mine is sourdough.

If you had to chose one food to eat for the rest of your life, what would it be?

Strawberries N’ Cream Bread + Video of Gabriella

So apart for the sleep training & a few nights of crying, Gabriella is at a REALLY fun age! I feel like I say that every time I talk about her age, but seriously it just keeps getting more fun. Her little personality just comes out more & more.

She also started crawling…which of course was HUGE! I caught it on video (I hope it works- if it doesn’t work & you want to see it, try playing it in ‘full screen’ mode), which you can see below. Please don’t fun of my voice- I was sick (very sick!) & of course I was doing baby talk. Winking smile

As you can see her funny crawl is more of a frog hop- she looks hilarious!

Monday night we started baby proofing because the first thing that caught her attention are the outlets and she is UNSTOPPABLE. Even though she ‘hops’ along she can MOVE! My Mom was cracking up when she saw her. She was like ‘well, it’s definitely not a ‘normal’ crawl, but she is crawling!’

We also had to add a baby gate to the front of our TV/ DVD area because she pretty much attacks the DVDs the second we aren’t looking. (which doesn’t happen anymore, this was before we realized HOW mobile she really was)

Aviary Photo_130172667367327297

(Mom: Please note which movie we are watching, Despicable Me, and please notice the part that it is currently on. Winking smile She’s definitely your grandchild because it is actually the only movie she will sit and watch. Not that I can blame her! Smile )

I also love how much Gabriella loves being in the kitchen. She can be incredibly fussy & then I bring her into the kitchen with me while I cook dinner and she LOVES it. I can already tell she is going to be the BEST kitchen helper! I am VERY much looking forward to making Christmas cookies with her this year!!! It makes my heart melt when I think about it.

The other day our afternoon walk plans were ruined. It was POURING outside & there was NO way that we could do anything outdoors. I could tell Gabriella was getting a little antsy, so I figured we would head to the kitchen & figure out something to bake.

I looked through a few recipes & decided on Strawberries N’ Cream bread. It is the perfect summertime bread, full of fresh strawberries & Greek yogurt for the ‘cream.’

IMG_5733

I changed a few things around to make this bread a bit healthier and no one will know the difference between the original recipe & this ‘health-ified’ recipe, I guarantee it Smile

Strawberries N’ ‘Cream’ Bread

(adapted from this recipe)

Ingredients:

  • 1/2 cup butter, softened
  • 1/4 cup Truvia baking blend*
  • 1/4 cup sugar
  • 1 egg
  • 1 egg white
  • 1/2 cup plain Greek Yogurt (I used 0% Chobani)
  • 1 teaspoon vanilla extract
  • 1 cup all purpose flour
  • 3/4 cup whole wheat flour
  • 1/2 teaspoon baking powder
  • 1/2 teaspoon baking soda
  • 1/2 teaspoon salt
  • 1/2 teaspoon ground cinnamon
  • 1 cup chopped fresh strawberries
  • 1/2 cup chopped pecans

*If you prefer not to use the Truvia baking blend, just use 3/4 cup sugar & omit the 1/4 cup additional sugar.

Directions:

  • In a large bowl, cream butter, Truvia and sugar until fluffy. Beat in egg, then egg white. Add Greek yogurt and vanilla; mix well.
  • Combine the flours, baking powder, baking soda, salt and cinnamon; stir into creamed mixture just until moistened. Fold in strawberries and 1/4 cup nuts.
  • Pour into a greased 8-in. x 4-in. loaf pan. Sprinkle with remaining nuts. Bake at 350° for 65-70 minutes or until a toothpick inserted near the center comes out clean. Cool for 10 minutes; remove from pan to a wire rack to cool completely. Yield: 1 loaf.

Aviary Photo_130172676540171220

Not only did I have a very happy baby (happy baby, happy life Winking smile ) while we were baking, but I also ended up with a DELICIOUS quick bread that we could all enjoy! Not only did we enjoy it by the slice, but it’s also good crumbled in yogurt, Chobani of course. Open-mouthed smile 

The best part about this recipe is that you probably have all of the ingredients in your house right now! And you may just want to try this bread out for your July 4th holiday breakfast. Perfect way to start the day.

Any fun plans for tomorrow?? Do share!

We are heading to Jacksonville to see my family & to see some of my friends. I can’t wait!! And of course I can’t wait for Gabriella to see fireworks!! I have a feeling she’s going to love them!

Brown Butter Peanut Butter M&M Blondies

Good Morning!

I have come to realize that my blog has slowly turned into more of a Mommy blog. I apologize, kind of, for that. You see whenever you have children, they do turn into a HUGE part of your life. So it’s hard to NOT talk about Gabriella whenever I write a post. I also realize that not everyone is interested in what my daughter is up to on a daily basis. 😉

But I will do my best to try to mix it up a bit more- with some recipes & workouts. I have a whole list of workouts that I have made up, I just haven’t put them on here yet. They are coming!

Today I have a recipe to share with you. It’s not my own, it’s from one of my favorite baking websites that I have mentioned on here many times…Sally’s Baking Addiction. Trust me, just one look on her site & you will want to make EVERYTHING.

To be honest, I really don’t bake often, only because it’s just Craig & I and the last thing we want is a bunch of sweets laying around. But this week we have guests, my in laws are in town, and I always like to have some kind of goody! 🙂

After spotting some Easter M&M’s in the store this past weekend, I knew I had to find a recipe to use them in.

IMG_3315

After searching around on Sally’s site, I found THE recipe- Brown Butter Pretzel M&M Blondies. Now, I was wondering after reading the recipe what kind of impact the brown butter actually made. Let me tell you, it’s HUGE. Seriously. You MUST brown the butter. It gives the blondies SO MUCH FLAVOR. I really had no idea what a difference browning butter makes to the flavor of butter.

The only thing that I changed about the recipes was the I used peanut butter M&M’s instead of the pretzel M&M’s. And to be completely honest, the only reason was because Craig & I did a number on the bag of pretzel M&M’s that I had. Oops 😉

Brown Butter Peanut Butter M&M Blondies

makes 16 blondies

Ingredients

  • 1/2 cup (1 stick) salted butter
  • 1 cup dark brown sugar (packed)
  • 1 large egg
  • 1 teaspoon vanilla extract
  • 1 and 1/4 cup all-purpose flour
  • 1 teaspoon baking powder
  • 1/4 teaspoon salt
  • 2/3 cup peanut butter M&M’s

Instructions

  1. Melt butter in a medium saucepan over medium heat. Stir constantly. Remove from heat immediately when the butter begins to turn brown (about 6 minutes). Pour browned butter into large mixing bowl. Stir in brown sugar. Let the mixture cool to room temperature.
  2. Preheat oven to 350 degrees. Spray 8×8 square baking pan with cooking spray. Set aside.
  3. To the cooled down butter/sugar mixture, stir in egg and vanilla extract. Add flour, baking powder, and salt. Stir in peanut butter M&Ms.
  4. Pour into prepared baking pan and bake for about 25 minutes, or until the top is lightly browned. Allow blondies to cool for at least 1 hour and cut into squares. Store in an airtight container for up to 10 days.

Notes

RECIPE SOURCE: sallysbakingaddiction.com

IMG_3324

These were FANTASTIC!! Like I said before, the browned butter is KEY!

And of course, because I CANNOT go a post without a Gabriella photo…I had to show you what she did when I put the blondies next to her, she was longingly looking at them.

IMG_3330

(PLEASE notice her belly button. It’s mandatory 😉 )

IMG_3335

Poor girl wanted to try one SO bad.

Then she got mad at me because I wouldn’t let her have one, and look what she did. Knocked them RIGHT over. Notice that hand mid swing.

IMG_3339

IMG_3340

That’s the it wasn’t me Mommy! look.

Love that girl to pieces.

If you are looking for an Easter dessert, I HIGHLY HIGHLY HIGHLY recommend these. I think they would be a hit with anyone, which is sometimes hard to find with a dessert.

Have a great Thursday…some of you may have off tomorrow- ENJOY!! 🙂

Oatmeal Raisin Cookie Baked Oatmeal

Growing up I was always the kid that liked the weird flavors. Grape Skittles? Pass them my way. Grape jolly ranchers…couldn’t get enough. Pepto Bismol?! Yes, please. I would actually pretend that I had an upset stomach so that my parents would give me Pepto. What a weird little kid I was.

pepto-bismol

The funny part is that I still love the weird flavors…and I’m still in love with Pepto. But I do restrain myself now 😉

As I kid whenever someone would ask what your favorite cookie was, I quietly answered ‘Oatmeal raisin.’ I felt like a grandma. Aren’t Grandmas the only people that like oatmeal raisin cookies? I was the strange kid that liked oatmeal raisin…while the other kids were asking for chocolate chip.

The good part in all of this was that I got the ‘leftovers…’ the grape skittles no one wanted, the oatmeal cookies that were overlooked. I was in heaven!

grape skittles

This past weekend I was trying to come up with a new recipe for breakfast. We always have a big breakfast on Sunday, skip lunch (because we are so full) & then typically have an Italian dinner. (lots of pasta, which is very filling)

But I was over the usual breakfast foods…eggs, bacon (for Craig), toast, pancakes, waffles…I wanted something new.

We are both big fans of oatmeal, so I thought I would do something involving oatmeal…and I didn’t just want a big bowl of oatmeal.

That’s when I thought baked oatmeal would be good…and not just any baked oatmeal, but oatmeal raisin cookie oatmeal.

IMG_1568

Oatmeal Raisin Cookie Oatmeal

Ingredients:

-3 cups oats (I used old fashioned)
-1/3 cup packed brown sugar
-2 tsp baking powder
-1 tsp salt
-1/2 cup raisins (I used golden raisins)
-2 tsp cinnamon
-3 egg whites
-1 & 1/2 cups Almond milk (any milk should work)
-1/4 cup light maple syrup
-1 1/2 tbsp margarine, melted
-2 tbsp. light maple syrup, optional

Preparation:

1. In a large bowl, combine the oats, brown sugar, baking powder, salt, raisins and cinnamon. In another bowl, whisk the egg whites, almond milk, 1/4 cup maple syrup and butter. Stir into oat mixture until blended.

2. Spoon into a greased 9-in. square baking pan. Drizzle with  2 tbsp maple syrup, if desired. Bake at 350° for 35- 40 minutes or until set. Yield: 9 servings.

Per serving: Calories: 206, Fat: 3.3g, Sodium: 452mg, Potassium: 153mg, Carbs: 46g, Fiber: 3.5g, Sugars: 20.9g, Protein: 5.5g

What I liked most about this recipe, besides the fact that it REALLY did taste like an oatmeal raisin cookie, was that it cut into pieces…almost like a coffee cake.

IMG_1571

IMG_1572

Nice big chunks of baked oatmeal! We both enjoyed it so much that we had two pieces EASILY. I think I was leaning more towards three pieces…it was just that good, I kept picking at it. 🙂

IMG_1574

IMG_1569

This breakfast held me over until dinner with NO problem! At only 206 calories per serving, it’s hard to beat! Full of fiber & protein, it is definitely a winner for a healthy go to breakfast.

It’s another easy make ahead meal that you can just ‘grab & go’ during the weekday.

Other ideas for mix ins: nuts, chocolate chips, dried apples or strawberries. The possibilities are endless!

Cooking With a Newborn

Well, I guess Gabriella has moved on from the ‘newborn’ stage…since she is 12 weeks old…but I think it’s no longer ‘newborn stage’ until 3 months. And since she is technically not 3 months yet, I’m sticking with newborn. She is growing up WAY.TOO.QUICK. But I know, they always do!

So I’m sure you have heard how much life changes when you have a baby, or you already know if you are a parent. It completely changes. I mean everything! Of course we totally LOVE the changes, but some take a little bit of getting used to.

One of them being cooking. Now I know that may sound stupid, but let me explain.

Gabriella is NOT the type of baby that will just be content with sitting in her bouncer, or swing, or pack n’ play. Nothing. She wants to be held non stop. You can maybe get about 10 minutes of entertainment out of the bouncer…and then all of the sudden you hear the scream. She’s OVER it. She wants OUT immediately!

(Don’t mind the following pictures, they are all from my phone, so they are kind of grainy)

g bouncer

G in her Rainforest bouncer

g monkey

G in her monkey bouncer (which we ended up returning because it wasn’t what we were hoping for)

g jump

G in her jump a roo. Let me explain this picture so that you can get a good laugh too. You see G is still a bit too little for the jump a roo. So because she is still little for it, I stuck that pillow (thank you Tara, it’s come in handy for things other than just a lounger 🙂 ) underneath of it so that she could reach the ground & bounce around. It is SO FUNNY! I need to tape a video of her in it jumping on the pillow. She still isn’t quite sure what to do with it, so that makes it even better.

On Monday night we had a guest (a friend of Craig’s from college) over for dinner. I prepped everything early so that I wouldn’t be stuck in the kitchen the whole time while he was here. Since Gabriella always wants to be in my arms, and that isn’t always possible while cooking, I had to improvise.

First, she starts in her bouncer.

IMG_1226

(don’t mind the eye booger, poor thing has a blocked tear duct, which is very common & usually goes away on it’s own- just a matter of time)

Once she is over the bouncer, I pull the Pack n’ Play into the kitchen & she lays in that & watches her bears.

IMG_1234

Then the last resort is the Baby Bjorn. I save this one for last only because it ends up KILLING my back after a while…and she will stay in it for HOURS at a time, she loves it. I just got a few suggestions on my post about my top 10 must haves for a newborn for an Ergo carrier- I looked into it & I think that will be my next purchase for her. It looks like EXACTLY what I need, especially since it can hold up to I believe 45 lbs.

IMG_1251

Please don’t laugh at my attire, lack of putting my hair together or putting any make up on…nothing like sporting one of your husband’s shirts all day & looking like a total bum. Just call me a fashionista 😉

I’m just amazed at HOW much she loves that Bjorn. If I put her facing inward (towards me), she falls asleep in about 2.5 seconds. But I was trying to keep her awake the other day because it was getting close to her bedtime..and I didn’t want her to take a nap because she wouldn’t want to go to bed.

But YES, now you see how CRAZY I look when cooking. I swear if you were a fly on the wall you would laugh the whole time. Just because when I don’t have her attached to me, I am constantly singing, dancing & acting like a TOTAL fool so that she keeps laughing 😀

Along with the pasta dish that I made for dinner, I also made dessert. Not just ANY dessert. A Sally dessert. The BEST kind of dessert! 🙂 As you know, I recently became addicted to her website & have a LIST of her recipes to make. I’m slowly crossing them off & I swear each one gets better. Is that even possible?!

The dessert I decided to make was Cake Batter Blondies.  I knew this would be a winner because I mean who doesn’t love cake batter?!?

I followed Sally’s recipe exactly, I just left out the white chocolate chips because I didn’t have any. I also didn’t have the full amount of sprinkles that the recipe call for, but I can assure you it did not matter! These Blondies were OUT OF THIS WORLD.

Cake Batter Blondies

(Recipe slightly adapted From Sally’s Baking Addiction)

  • 1 box yellow cake mix
  • 1/4 cup canola oil
  • 1 egg
  • 1/2 cup milk (I used skim)
  • 1/3 cup sprinkles

Preheat oven to 350F degrees.  Spray 9×9 baking dish with nonstick spray. Combine first four ingredients in a large bowl. Add the milk slowly. You want to cake batter to be as dense & thick as possible. Mix in the sprinkles.Pour into prepared baking pan, sprinkle a few more sprinkles on top, and bake for 30-32 minutes until edges are just turning brown. Allow to cool for at least 30 minutes so the center sets, before cutting into squares.

*The blondies will look like they are not fully done because the center will be quite gooey, but that’s what you want! After about 30 minutes of cooling, they will be easy to cut using a serrated knife.

IMG_1259

IMG_1262

So. So. So. Good. Like you have to take them away from me good. Otherwise I will keep eating them. The best part about them? How moist they are! (& I HATE that word moist, ew, but it’s the only way to describe them) If you do anything today, I suggest you make these. Had a fight with your significant other? Make these. ALL will be forgiven. I promise. 😉

IMG_1272

Gabriella wanted to wear something to match the blondies…and I mean, who am I to stop her?! 😉

Hope you have a wonderful day…it’s ALMOST the weekend! Just keep reminding yourself of that if you are having a rough week. 🙂

M & M Addict

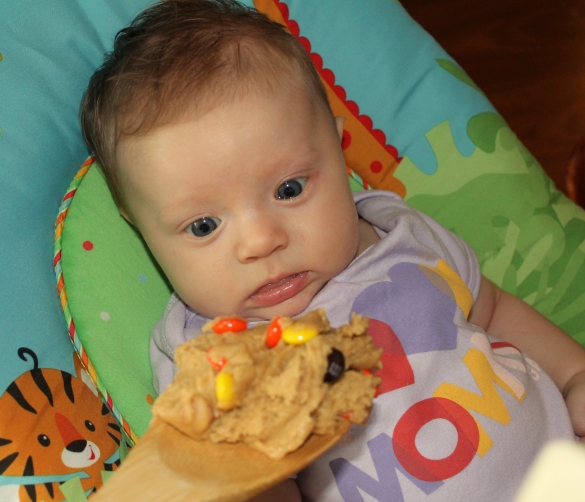
Someone got into the M&M’s yesterday & it wasn’t me. We won’t name names…

IMG_1119

She was trying to be all sneaky about it 😉 She takes after her Granddad, with his love for M & M’s. 🙂

Since they were opened, I figured I would make another Sally recipe that I had been eying – Peanut Butter M & M Cookies. Told you, I cannot get enough of her recipes!

Who doesn’t love the combination of peanut butter & chocolate?! I swear it’s like heaven on earth.

I don’t know about you, but I go through peanut butter like I go through water. It’s bad. But oh so good 😀

You know how I said I love to have easy go to snacks around the house? Well, peanut butter is another one of my favorite snacks. Nothing better than a spoonful of peanut butter to get you through a rough afternoon 😉

As I was reading through her recipe, every ingredient just kept getting better. Brown sugar, peanut butter & M & Ms….Oh my!

IMG_1134

I showed Gabriella the batter…and this was her reaction:

IMG_1139

She started licking her fingers. She was pretending it was the cookie dough.

Then I did something really mean.

IMG_1141

Bad Mommy.

She really just wanted to take her bath in the batter, but I told her I didn’t think that was a good idea.

IMG_1146
She was mad at me for the rest of the day.

One day, Gabriella, one day. 😀

Anyways, I can’t rave enough about these cookies. I took one bite, and they immediately reminded me of cookies from Great American Cookie Co.(the batter even looks like the picture below!)

Great-American-Cookie-Company_large

Do those even exist anymore?? I remember I used to LOVE the cheesecake brownie from there, which was weird because I don’t even like cheesecake. But for years I have been trying to find the ‘copycat’ recipe for those delicious brownies.

But their cookies were ALWAYS so soft & chewy, which are the best kind of cookies in my opinion. Those people that like hard, crunchy cookies make me wonder about them. 😉

I followed Sally’s recipe exactly and I wouldn’t change a thing. They are PERFECT the way they are.

Peanut Butter M&M Cookies

makes 3 dozen cookies

  • 1/2 cup (1 stick) salted butter, softened to room temperature*
  • 1/2 cup light brown sugar
  • 1/4 cup sugar
  • 1 egg
  • 3/4 cup creamy peanut butter
  • 1 tsp vanilla extract
  • 1/2 tsp baking soda
  • 1 and 1/4 cups all purpose flour
  • 1 and 1/2 cups M&Ms

Directions

In a large bowl, using a hand-held mixer or stand mixer with paddle attachment, cream the butter and sugars together on medium speed.  Mix in the peanut butter, egg, and vanilla (in that order). Slowly mix in the baking soda and flour. Do not overmix.  Fold in the M&Ms with a wooden spoon.  Chill the dough for at least 30 minutes.

Preheat oven to 350 degrees. Drop chilled dough by tablespoonfuls onto ungreased cookie sheet or silpat.  I pressed a few M&Ms on top of the dough balls.  Press the balls down (only slightly) since they won’t spread much while baking.  Bake for 8-9 minutes.  Cookies will be soft and may appear undone.  They will firm up as they cool.

Allow to cool completely on a wire rack. Enjoy!

*You may use unsalted butter in this recipe.  If so, add 1/4 tsp salt with the flour.

RECIPE SOURCE: SALLYSBAKINGADDICTION.COM

IMG_1149

IMG_1158

And the ONLY possible way to make these cookies any better is to serve them with a tall, cold glass of milk.

IMG_1156

That’s one thing G & I definitely agree on! 😀